Part 2: How to Plan a Composite Retaining Wall Project
OVERVIEW
Now that you’ve planned your composite retaining wall project, cleared the land and marked the post locations – it’s time to install the posts! We’ll recommend using SuperSleeper Composite Posts.
In this step, we’ll cover how to install composite retaining wall posts, including:
- What type of post you need & where
- How to create joiner posts
- Digging the post holes
- Setting retaining wall posts in concrete
- Optional: attaching fence brackets
Step 1: Type of posts you’ll need & where to put each one
When building a composite retaining wall, there are 2 types of posts you’ll need that can be customised to suit several different applications. ‘Channel’ refers to the opening on the side of the post that the sleepers fit into.
What is a ‘bay’ of sleepers?
A bay of composite sleepers refers to two or more sleepers that are joined together vertically. Each vertical ‘bay’ is separated by a post.
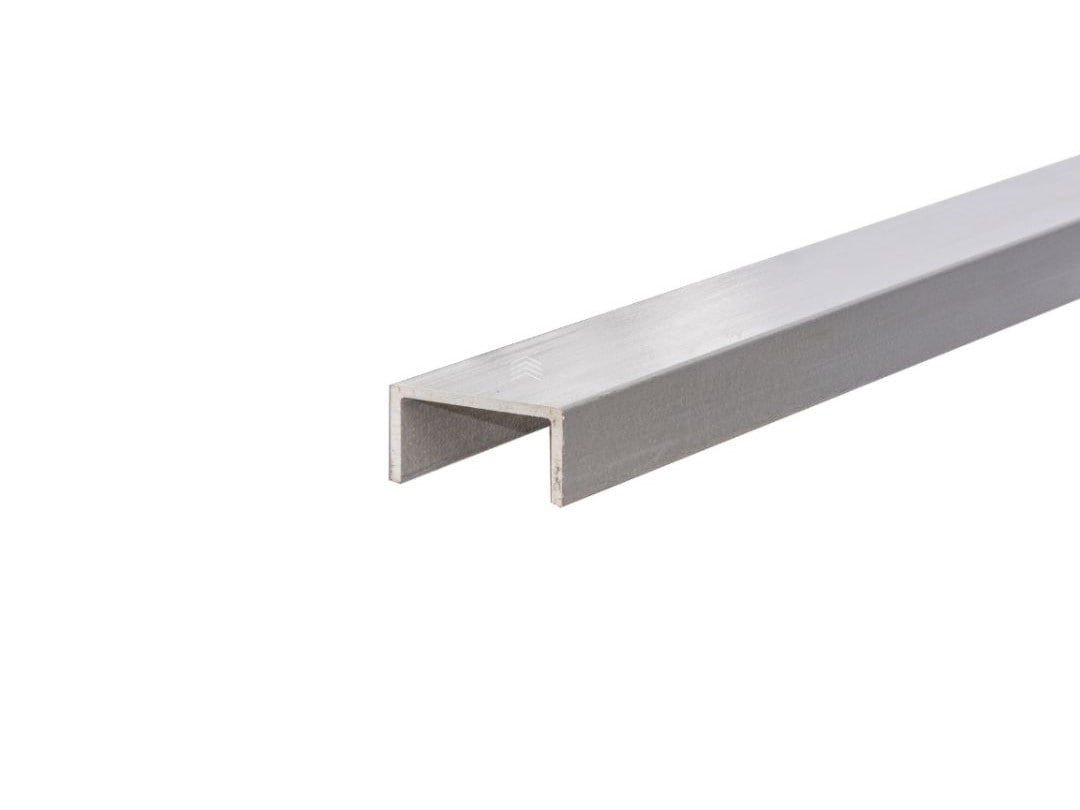
‘C’ Channel Composite Posts
All retaining walls will need at least two ‘C’ posts, one for each end. C posts are used in 2 instances;
- Closing off the end bay of a retaining wall
- Creating a turn / angle in a wall
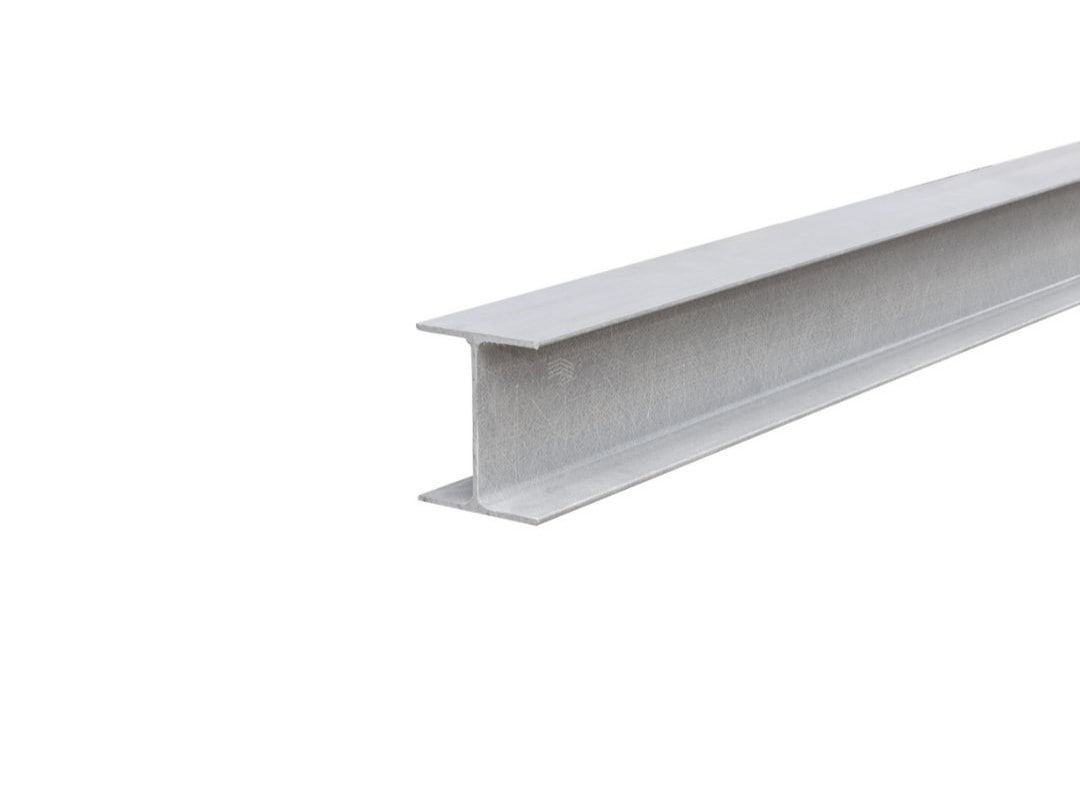
‘H’ Channel Composite Posts
Every retaining wall that has more than 2 bays will need H channel posts. Use a H post when you need to join two bays of sleepers together.
Step 2: Create joiner posts
Every retaining wall project is different, so you’ll need to tailor the posts to the required angles and ends. Here’s the different types of joins between bays of sleepers and how to create these joiner posts.

Joining 2 Bays Together in a Straight Line
When joining 2 sleepers together along one straight run, you need a ‘H’ post. They’re called ‘H’ posts due to the shape when viewing the post from the top. A sleeper can slot into each opening, thus creating a straight join between 2 sleepers.
Closing Off Sleepers at the End of the Wall
On the last panel of sleepers, you’ll need to close them off with a ‘C’ post. A ‘C’ post – also known as channel post – creates a neat finish to the end of a retaining wall.
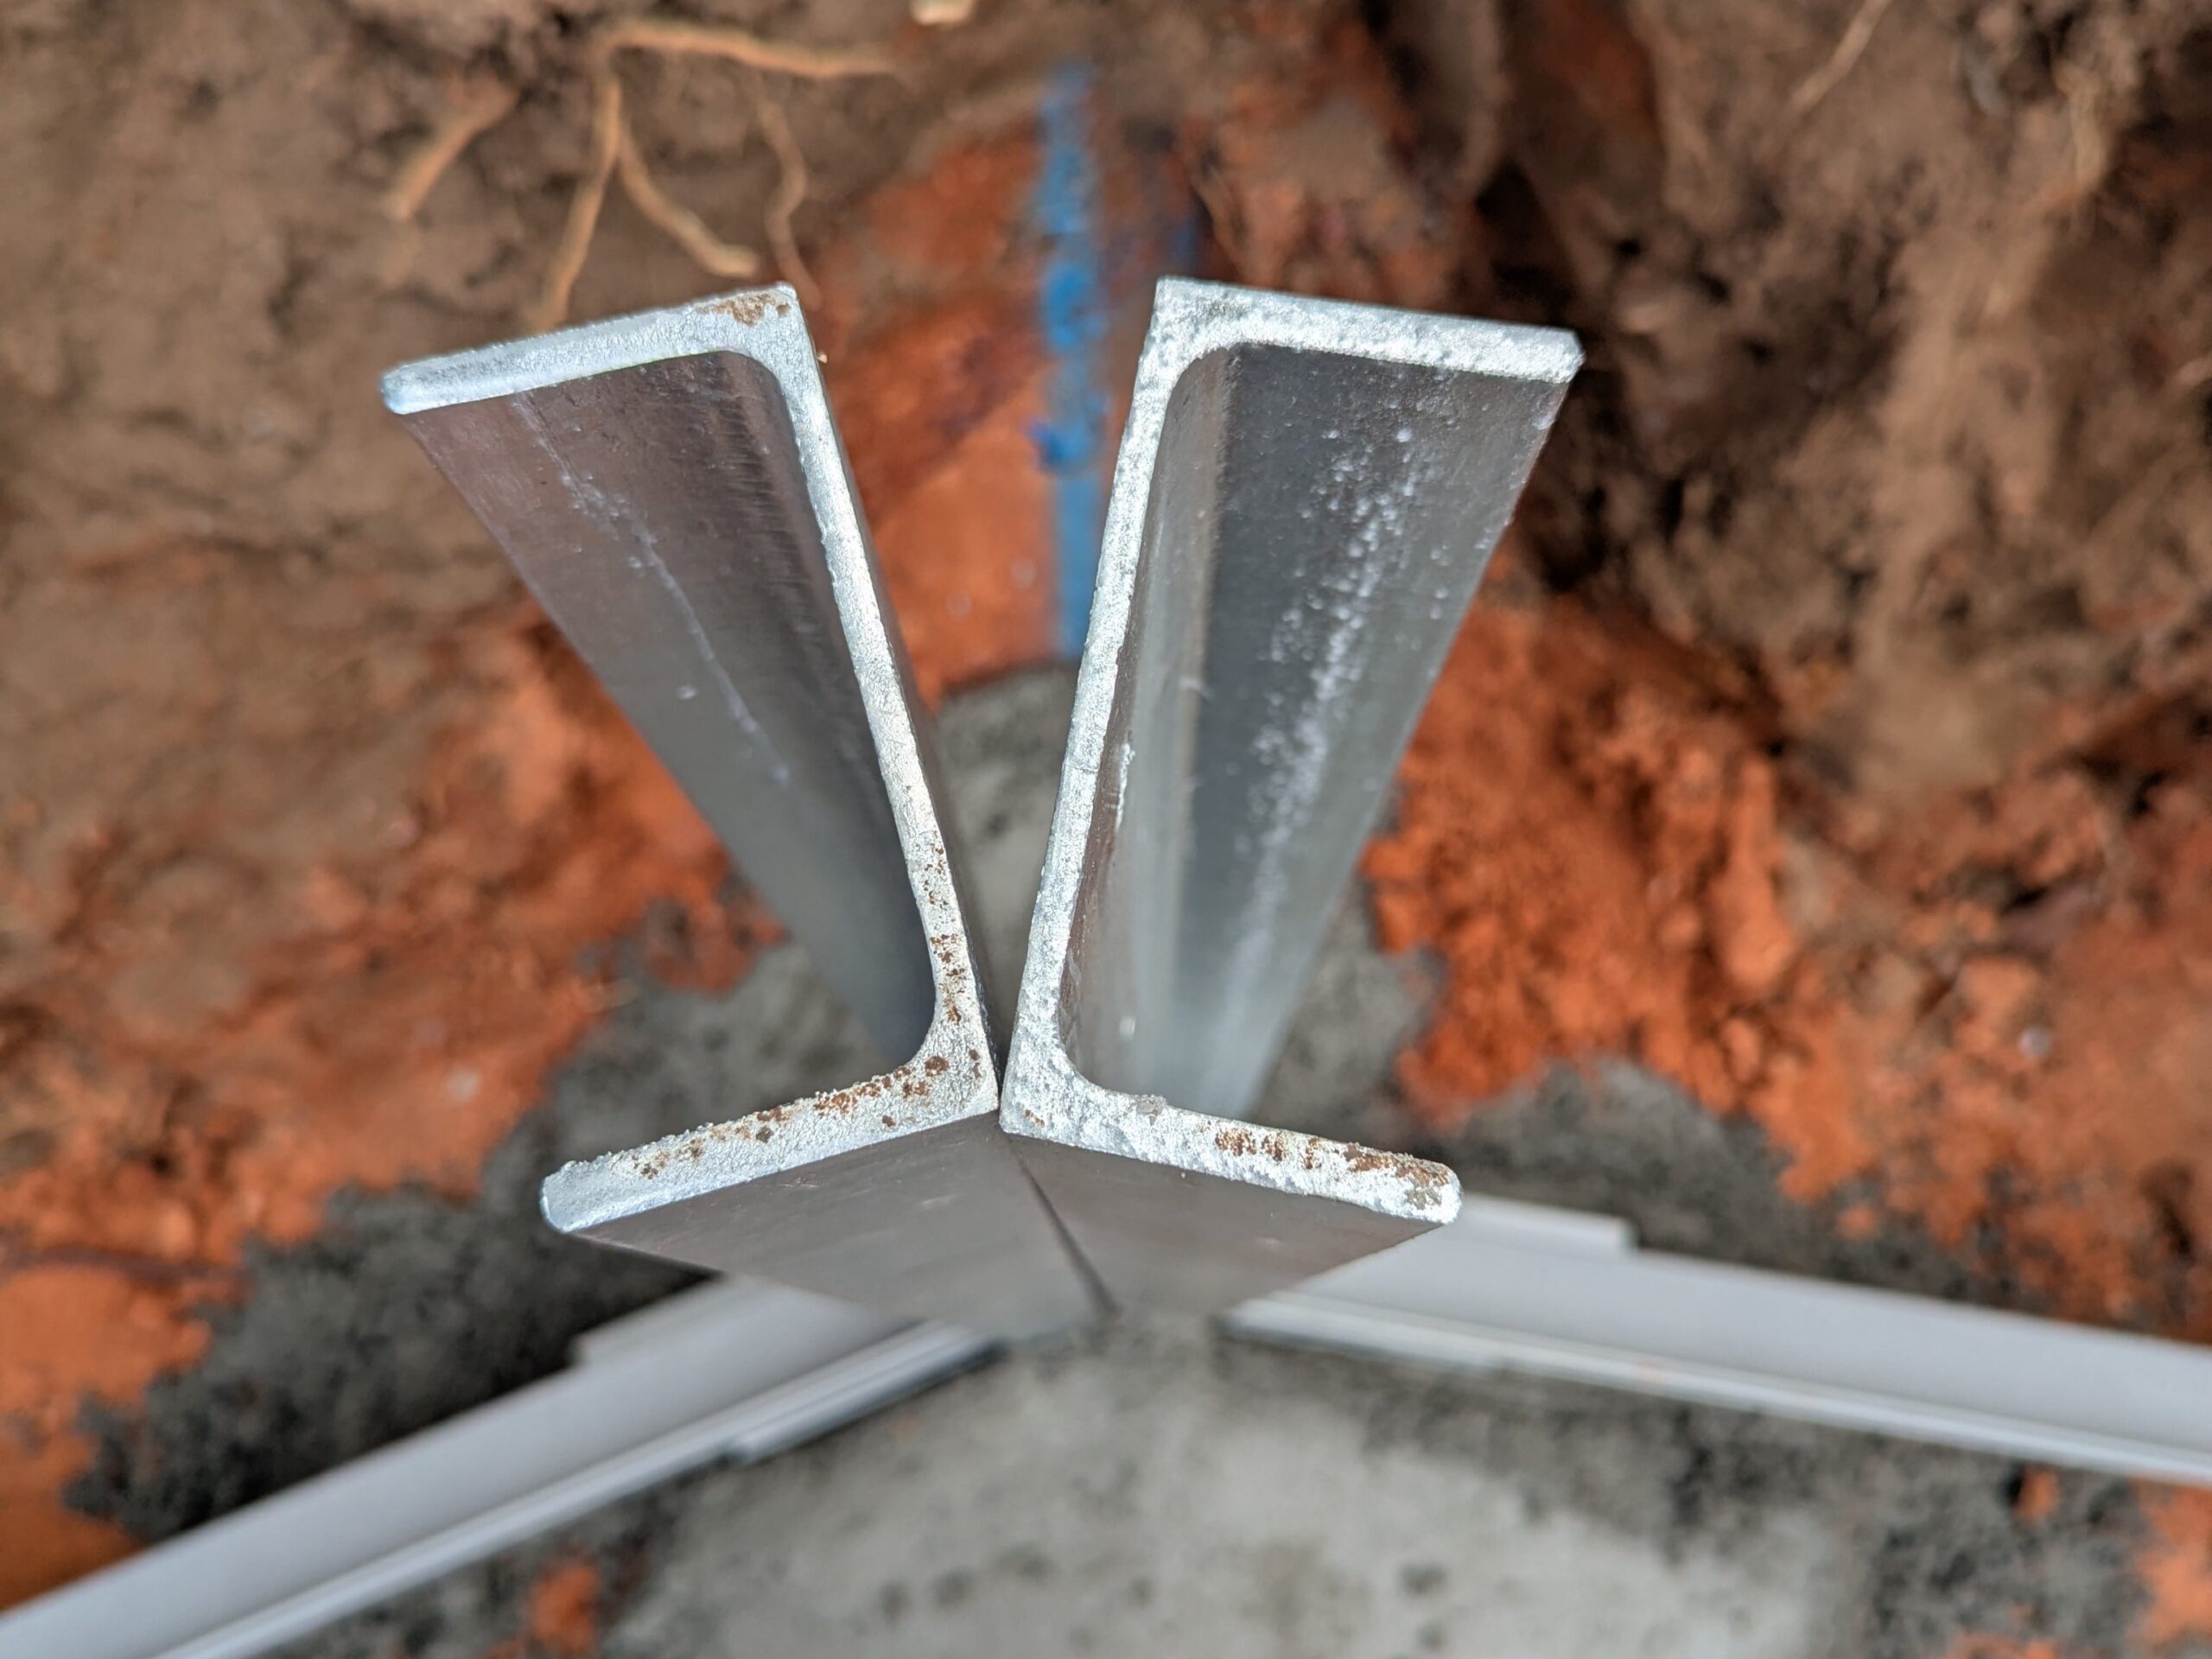
Joining Sleepers to Create a Turn / Angle in the Retaining Wall
The most common angle join between 2 sleepers is 90 degrees. This is used in situations where the retaining wall needs to span more than just one direction.
In our project, this join is not quite 90 degrees, so it wouldn’t be economical to screw the posts together. Instead we concreted the posts at their correct angles.
Angles are created by screwing 2 ‘C’ posts together to create openings for the sleepers to sit in the correct direction.
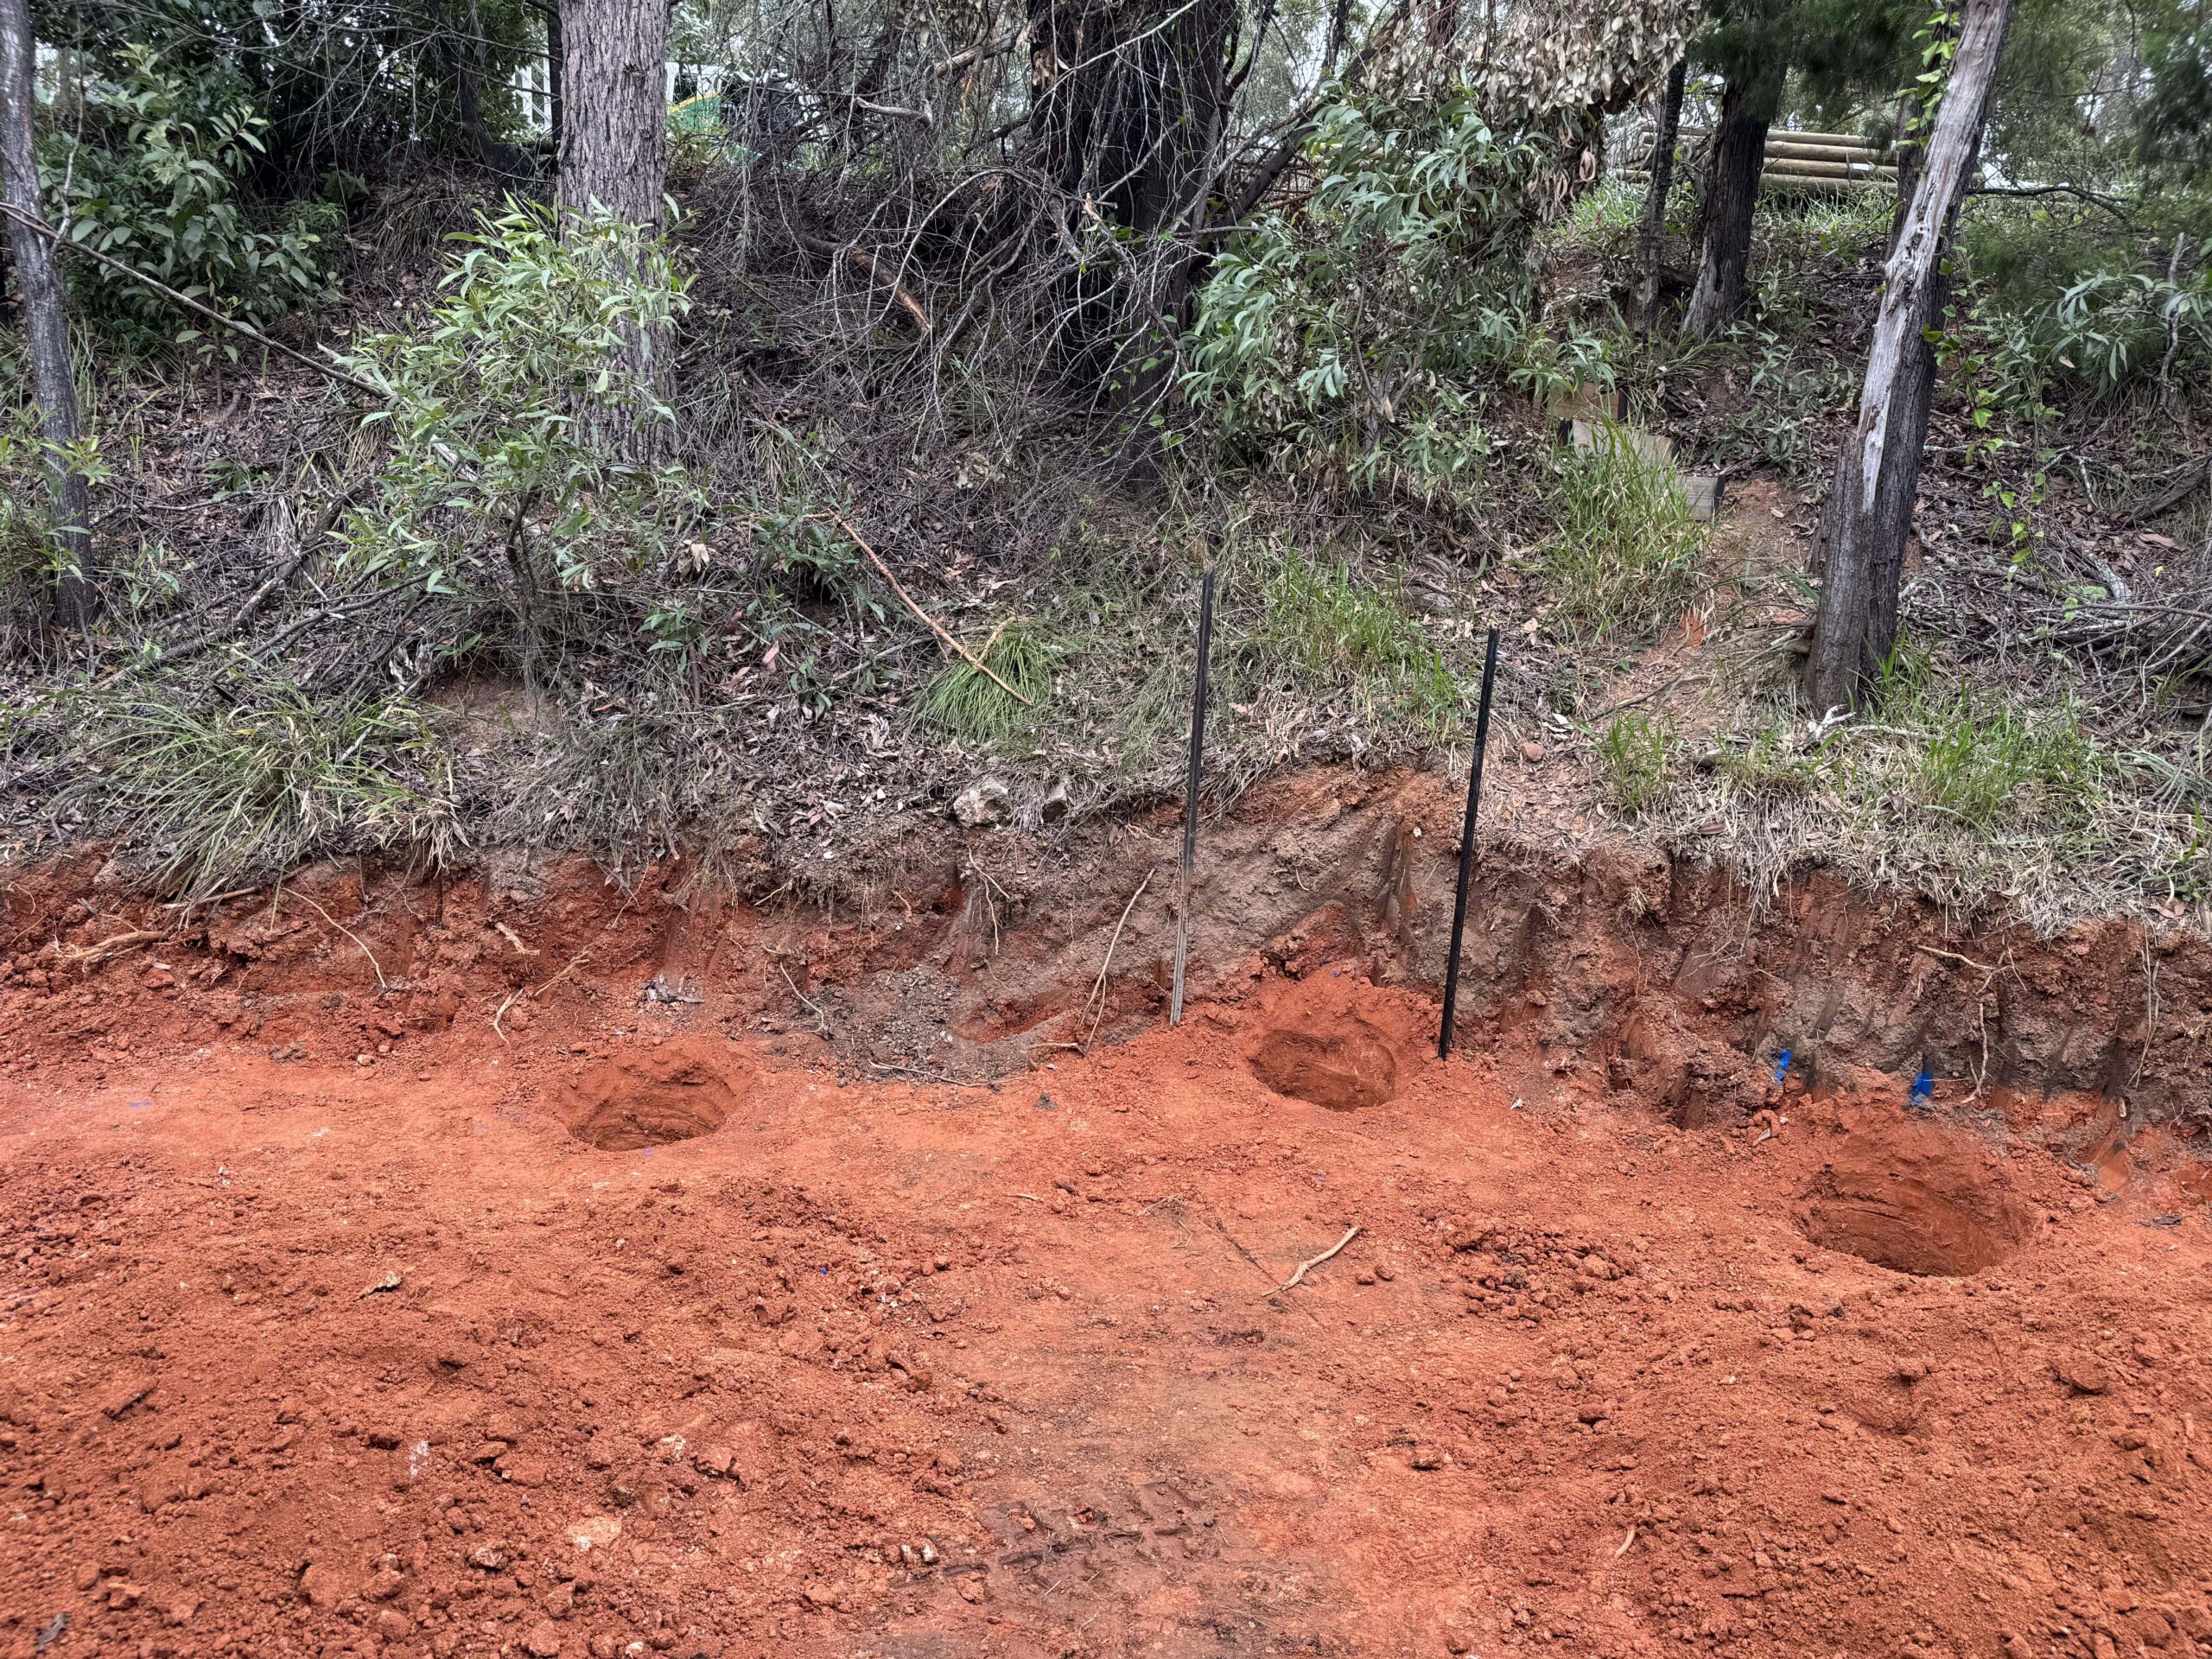
Step 3: How to Dig Retaining Wall Post Holes
What tools you’ll need:
An auger hole digger will make digging your post holes a lot easier, but most DIYers don’t just have an auger hole digger lying around in their backyard. Instead, you can use a good old-fashioned shovel or post hole pincers.
Dig the holes where you marked the post locations when mapping out the retaining wall in step 1.
A post hole digger (post hole pincers) or long handled shovel will make this easier for you.
Remember: dial before you dig to keep your work site safe.
How deep should I dig my retaining wall post holes?
If there will be a fence above the retaining wall, your retaining wall posts should be buried 600mm in ground to create a sturdy foundation. However, if your retaining wall is short with no fence above the post doesn’t need to be that deep. A good rule of thumb is the length of the post above ground + 100mm = depth of post hole.
How wide do the post holes need to be?
The retaining wall post holes should be 3x the width of the composite post. C channel posts are 100mm wide and H posts are 120mm wide. Most people just dig all the post holes 350-400mm wide to be safe.
Tip: Work slowly. Fil in small amounts of concrete, stir to remove any air bubble and check your posts are straight by using a level.
Step 4: Setting retaining wall posts in concrete

Now that you’ve figured out what composite posts go where and dug the post holes it’s time to set them in concrete!
To install SuperSleeper Composite Posts you’ll need:
- Concrete (we recommend Rapid Set for short walls <600mm and Post Mix for walls >600mm)
- Measuring and levelling tools
Fill the hole with 100mm of concrete and wait for it to set. It’s important to let this set completely so that your post has a sturdy base to sit on in the hole.
Note: For walls over 1000mm, ensure to follow the engineer’s specifications for post holes
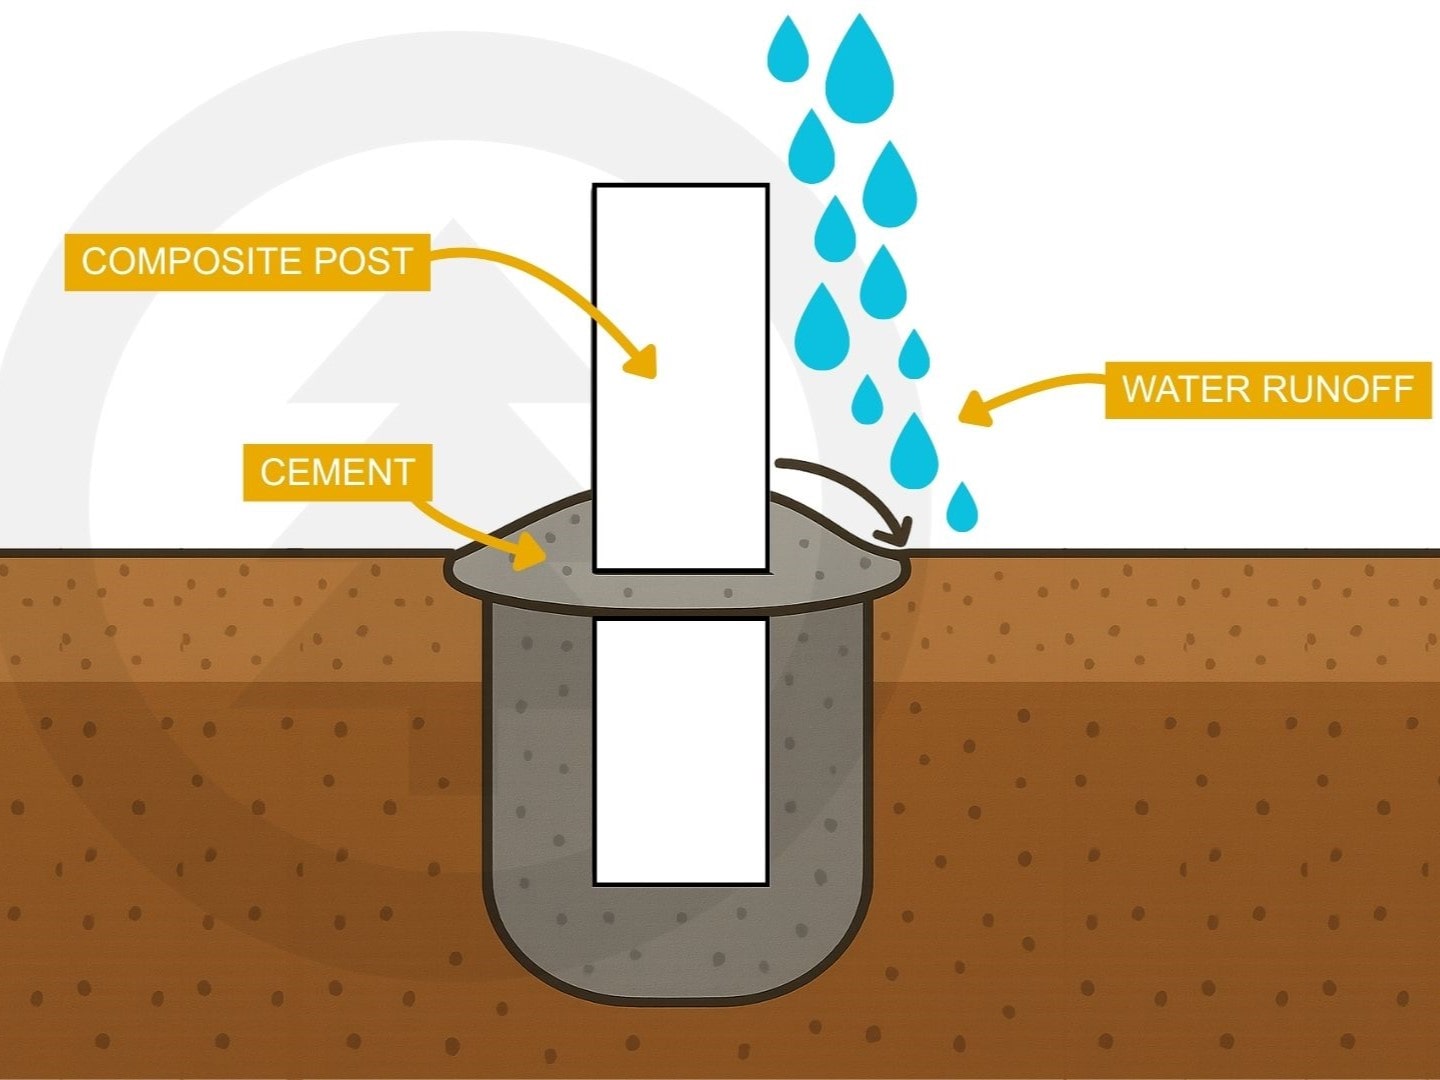
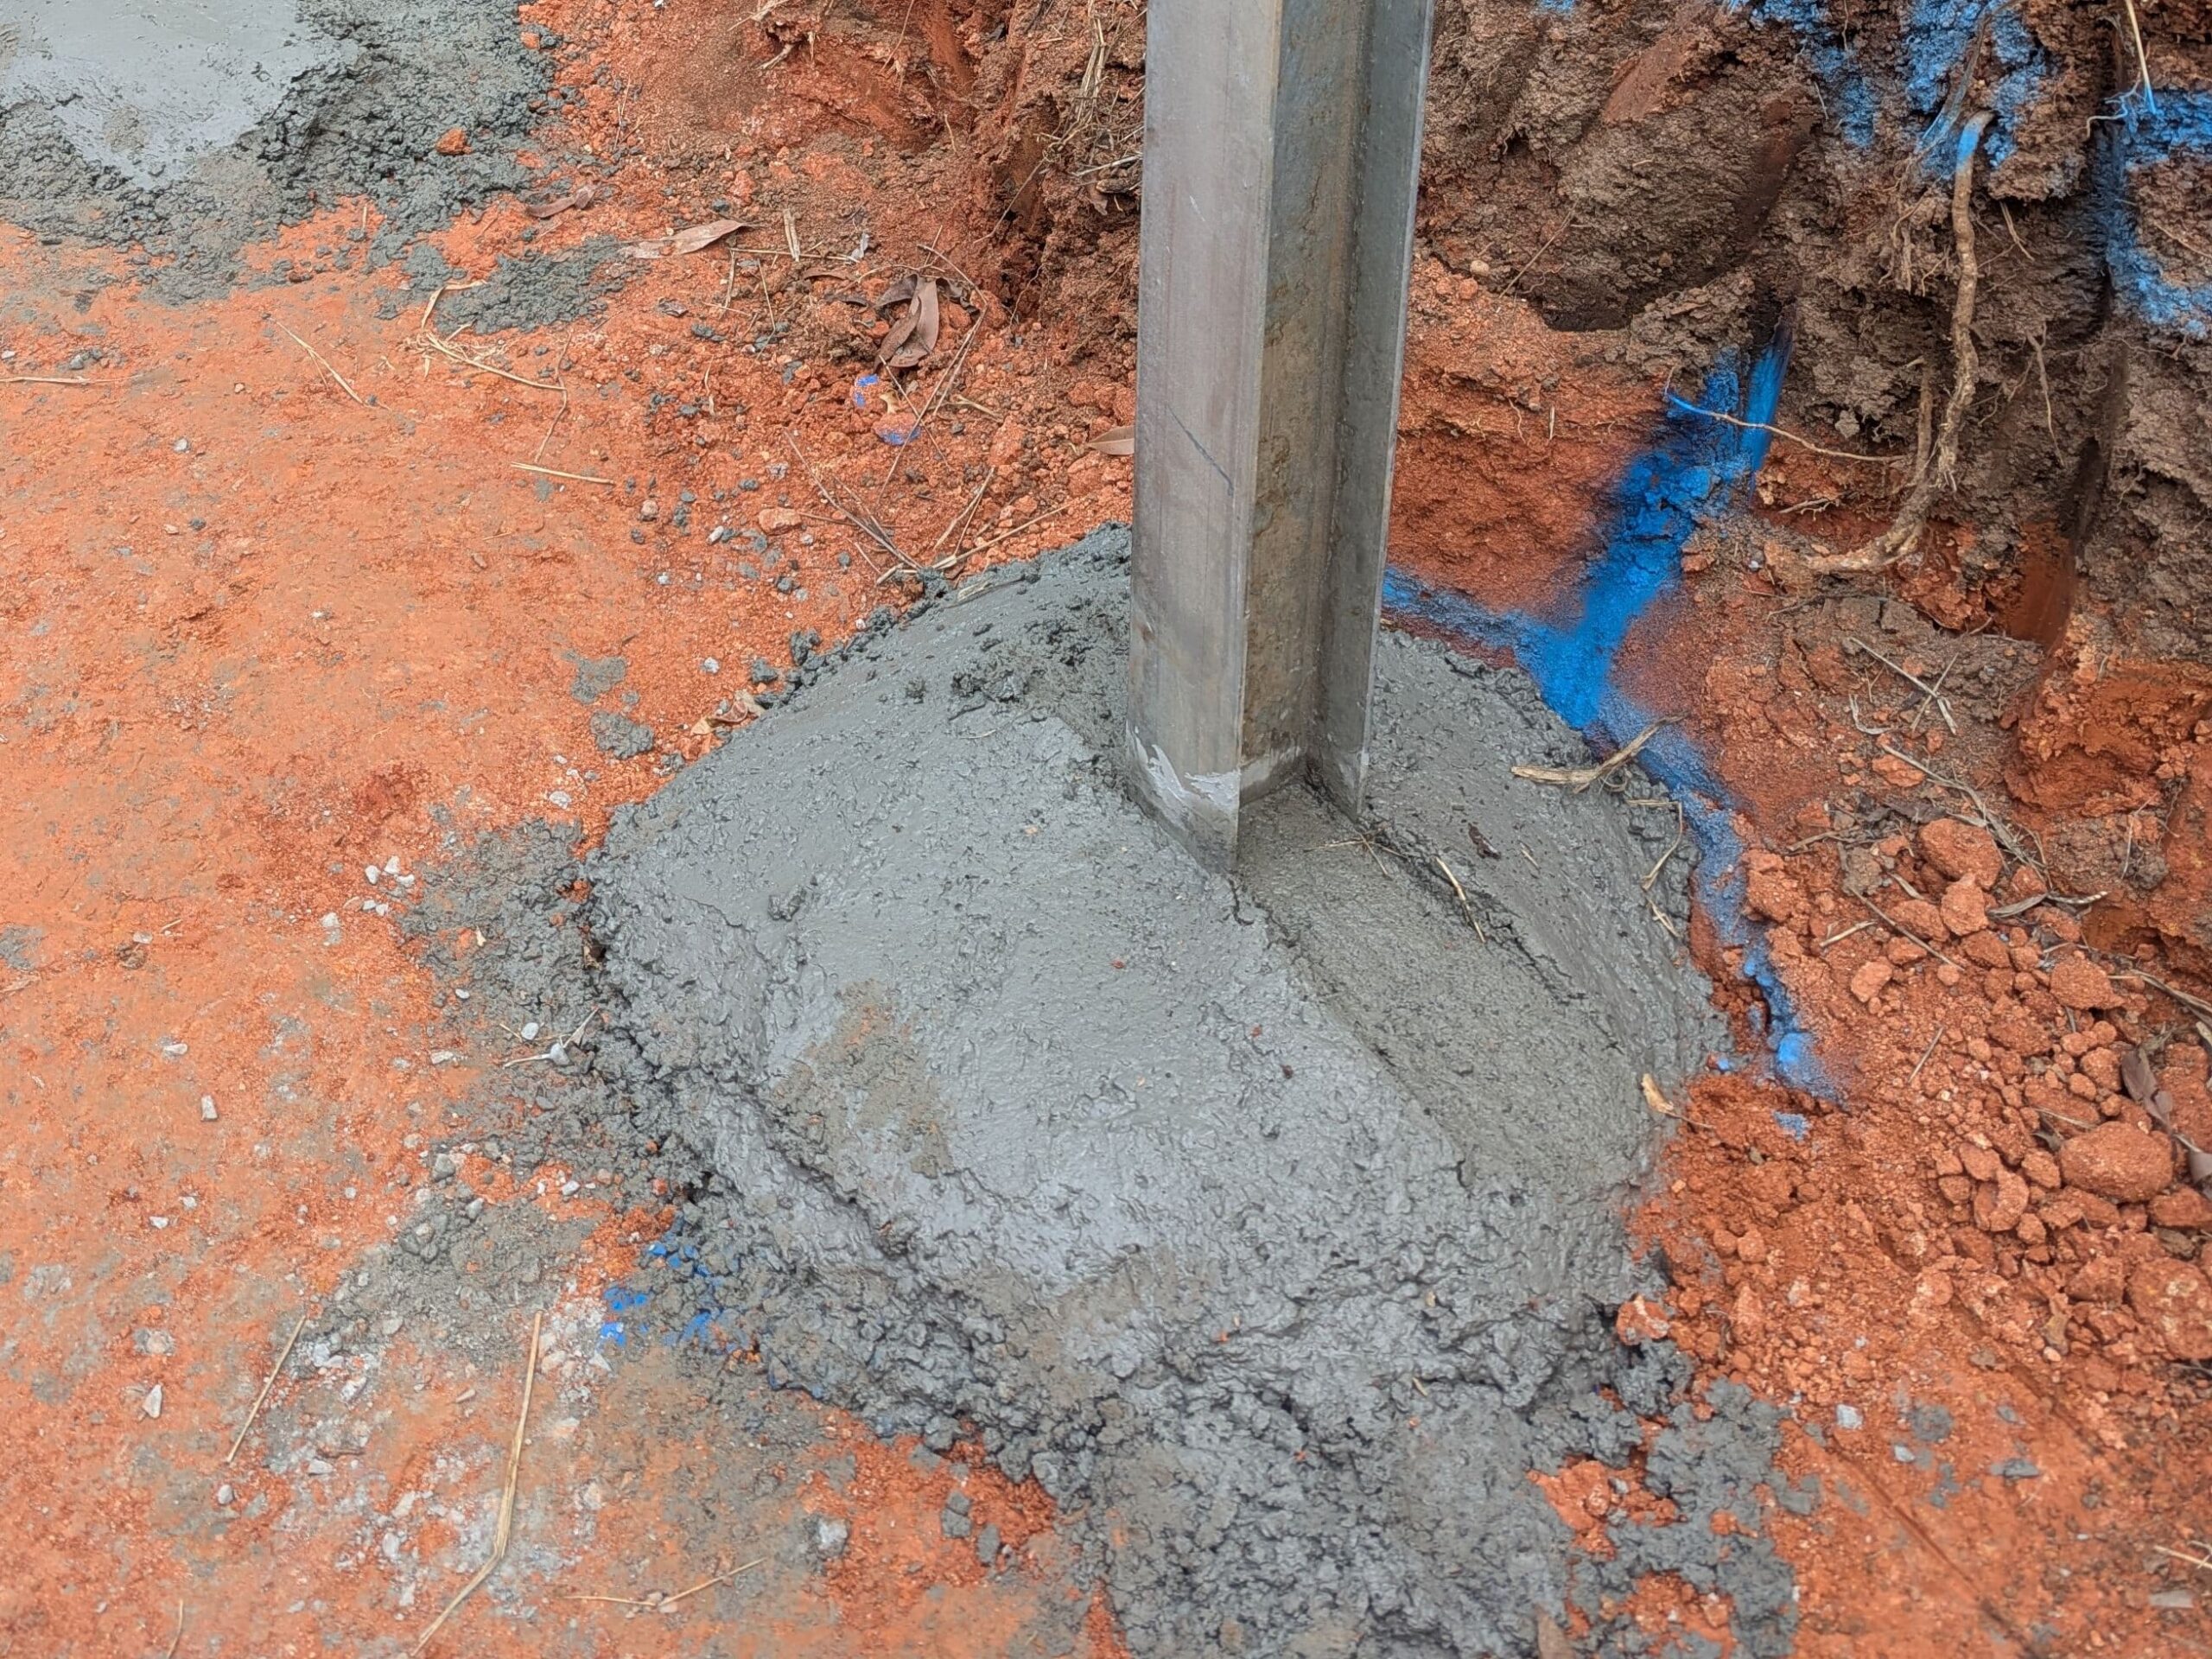
Continue to fill more concrete until you’re slightly above ground level (about 25mm). The top of the concrete should have a curve with a peak in the middle where the post rises from. This is so that when water falls down the post and onto the concrete, it has a natural runoff slope rather than pooling on top the concrete.
Note: Don’t make the curve in the concrete too high, as you still want the sleepers to sit flat on the ground. Before the concrete dries, carve out channels into the concrete (as seen in photo) for the sleeper supports to slot into.
Allow the concrete to dry for 24 hours before doing any more work on your composite retaining wall!
Optional: How to attach a fence bracket
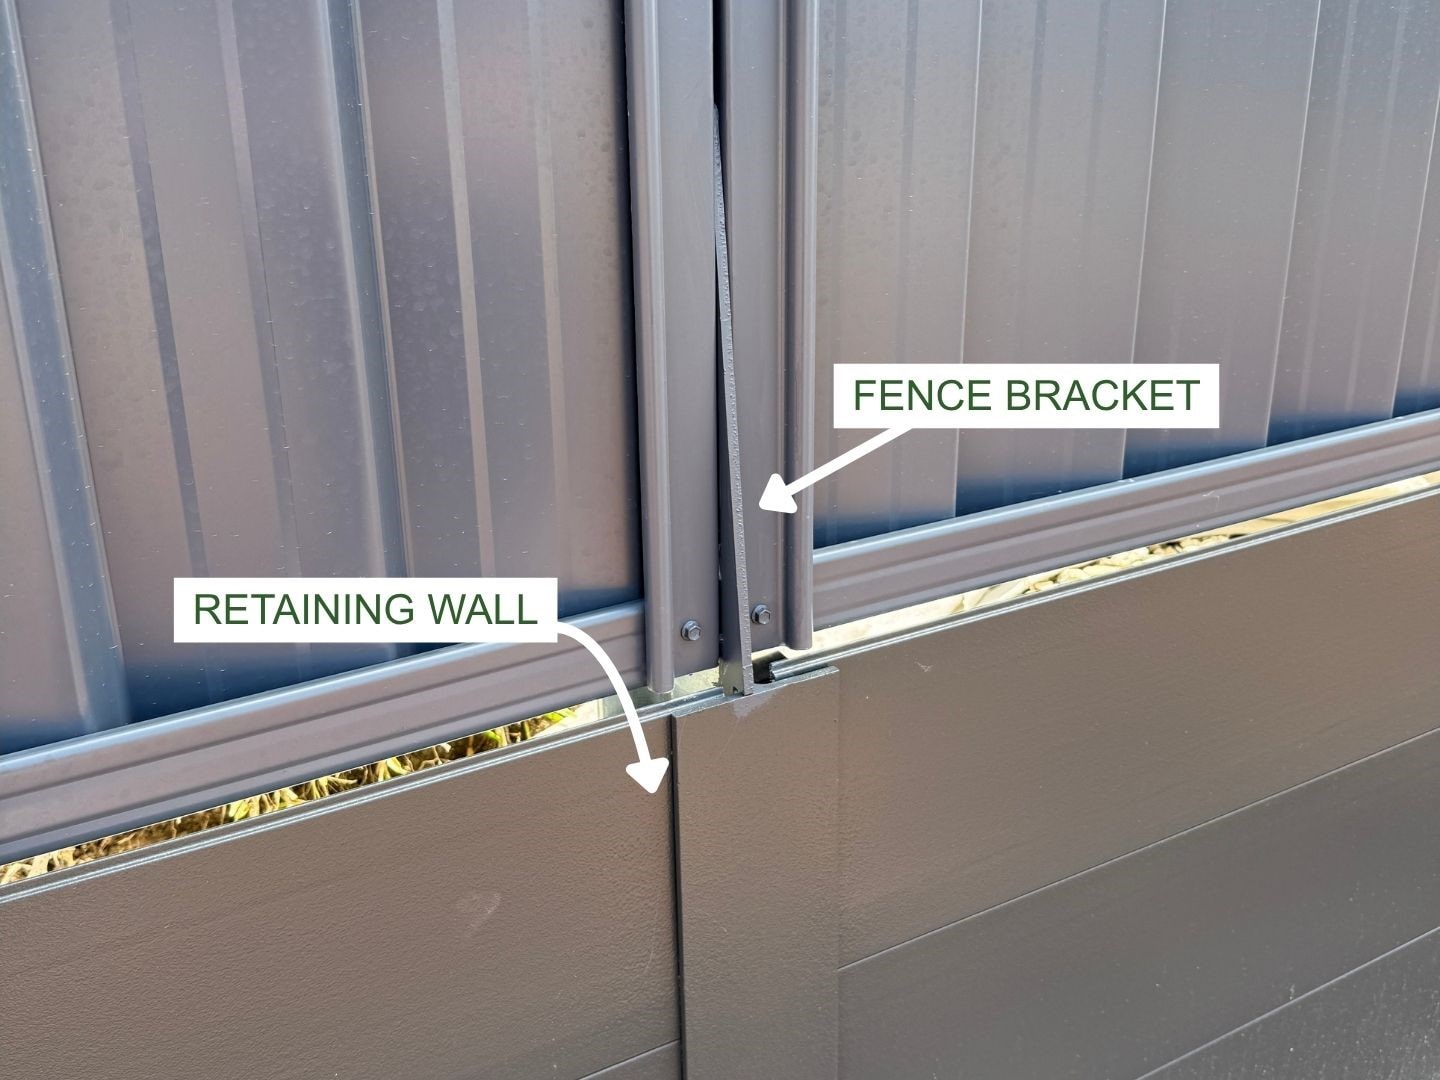
If you’ll be building a fence above your composite retaining wall, you’ll need to attach a SuperSleeper Composite Fence Bracket to the composite posts before installing the sleepers.
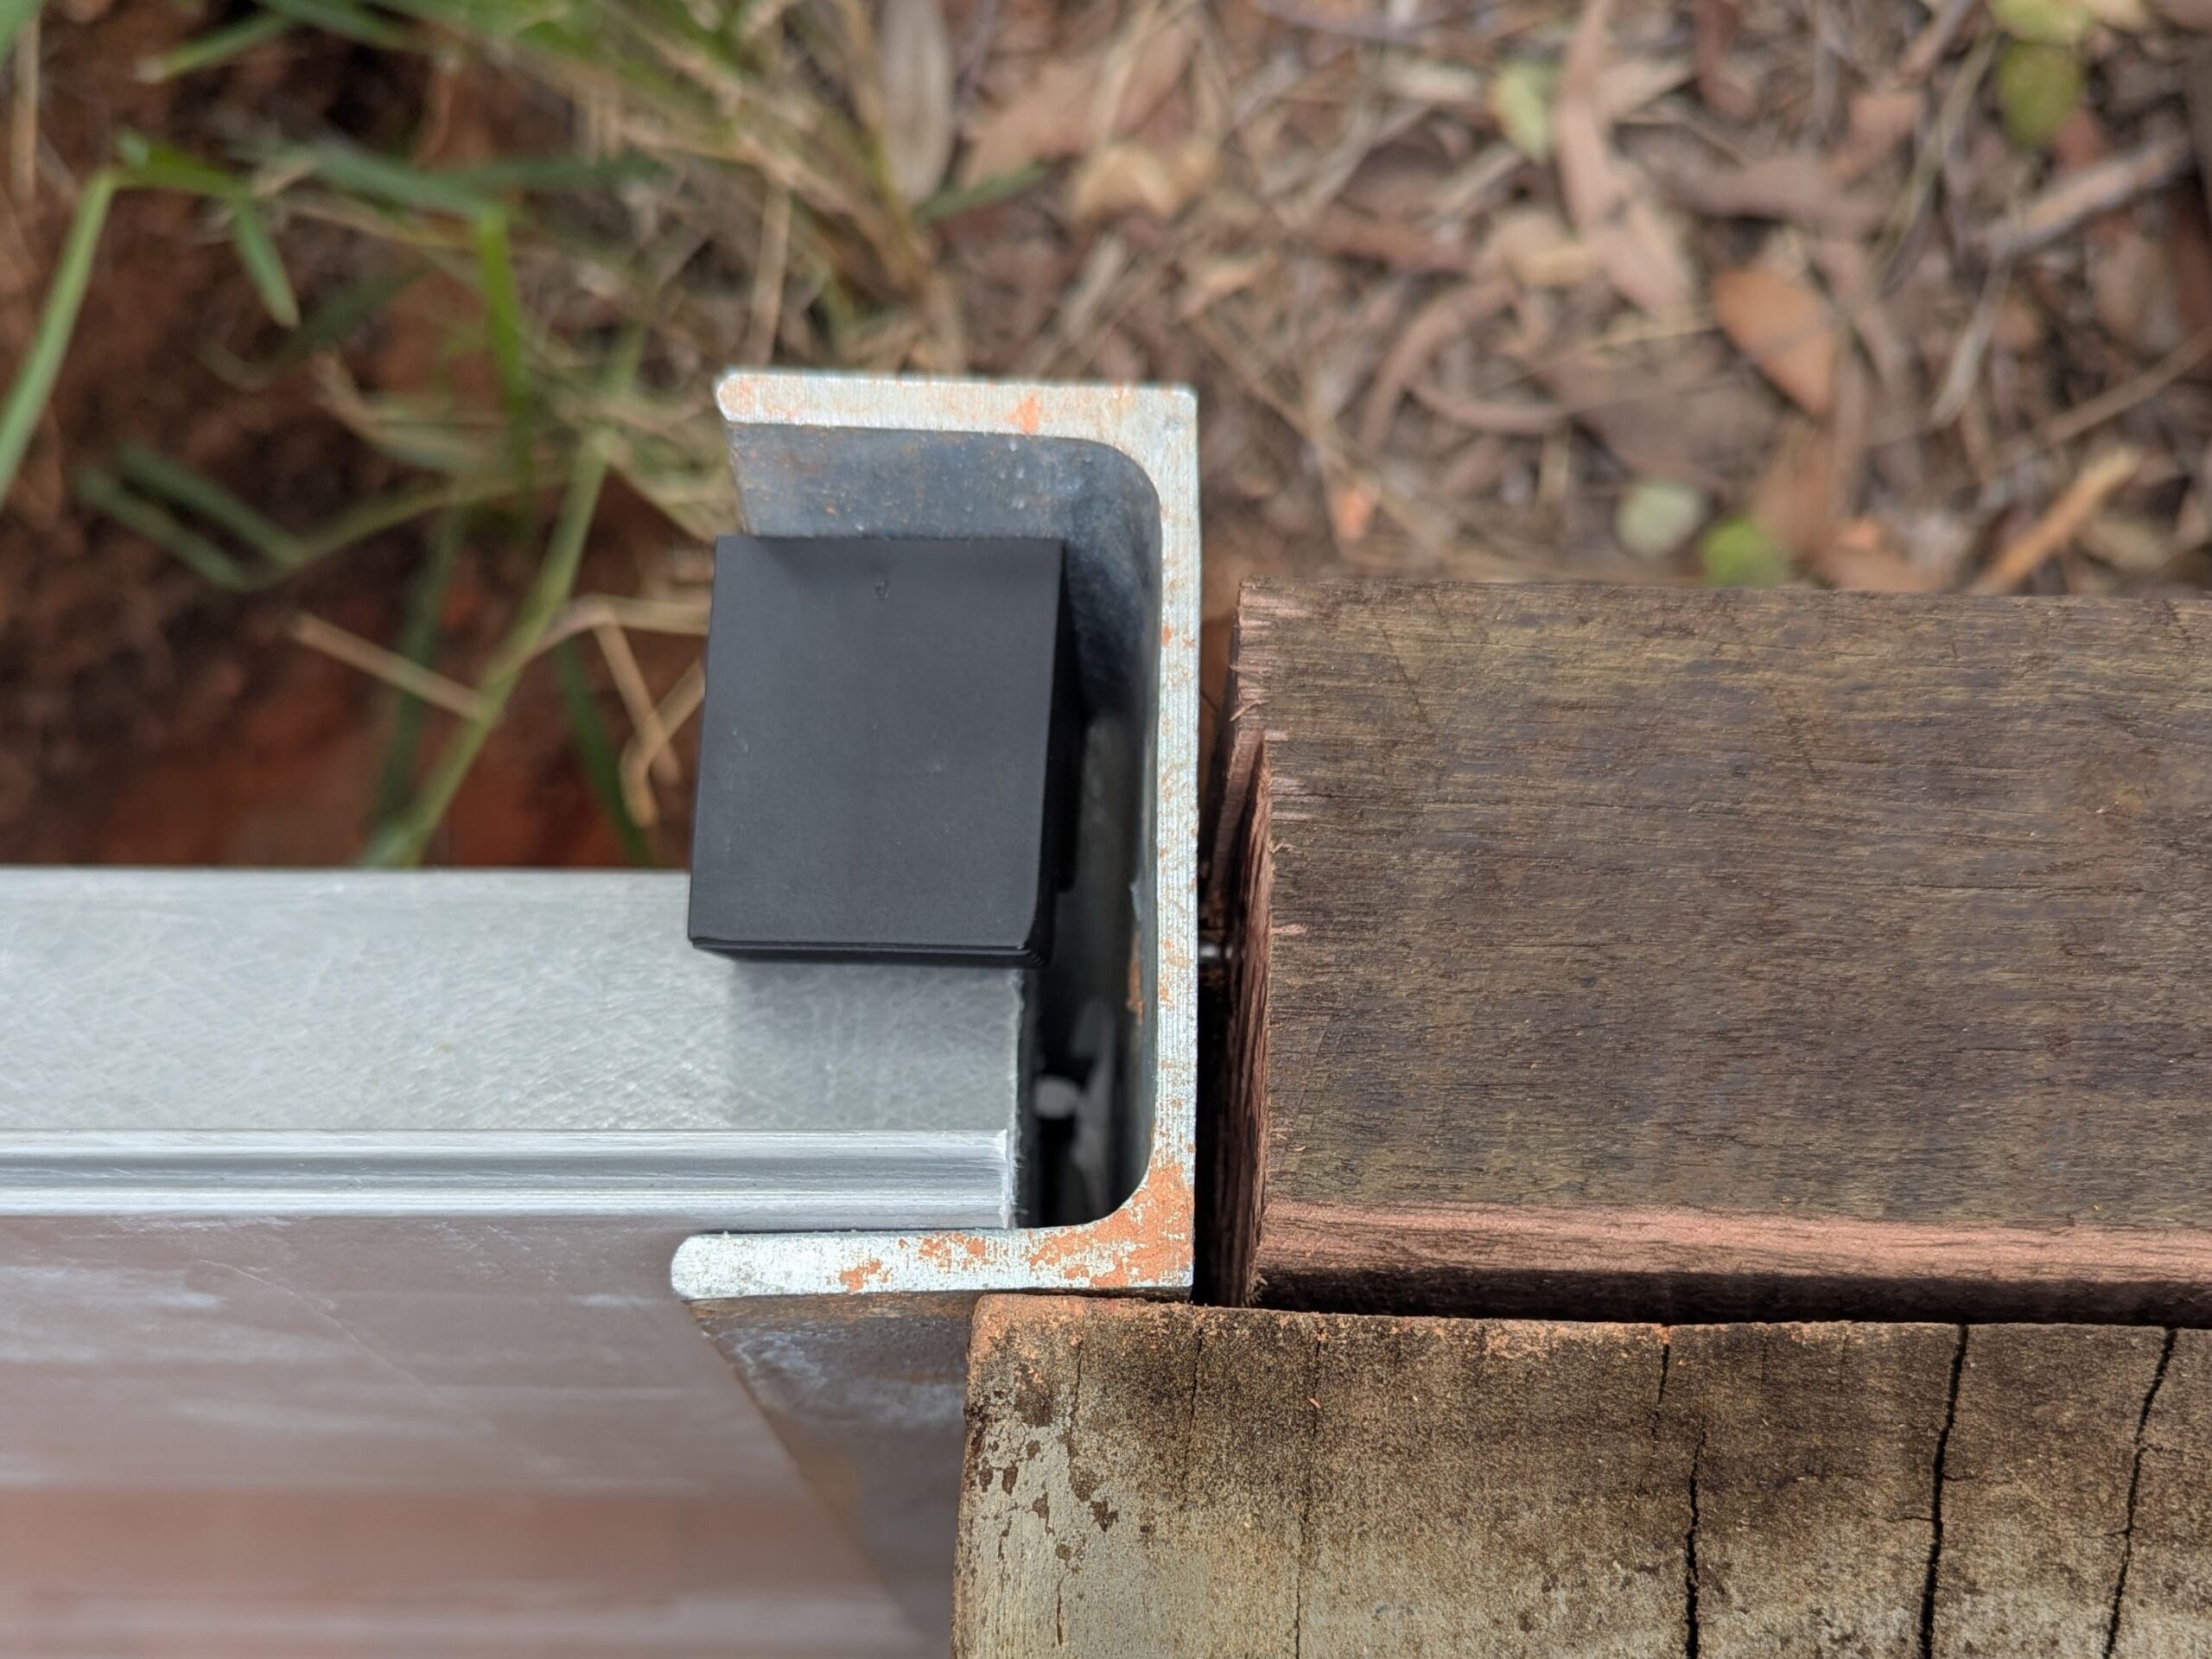
Alternatively, you can use a galvanised steel ‘shark fin’ fence bracket.
To do so, first place the fence bracket on the inside of your post. Make sure the fence bracket is placed exactly halfway in the post and halfway out.
Next, use the SuperSleeper Hardware nuts and bolts to secure the fence bracket to composite post through the pre-cut holes. Make sure to secure the nut on the bolt from the other side of the post.