Part 4 – How to Build a Retaining Wall Drainage System
OVERVIEW
Creating a retaining wall drainage system is crucial for ensuring the longevity of your composite sleeper retaining wall, especially in Australia where building standards are stringent. A correctly built drainage system will keep your retaining wall free from hydrostatic pressure and strain for its lifetime. In this part, we’ll cover:
- Preparing the drainage area
- Install the drainage blanket
- Placing ag-pipe
- Backfill and finishing
- Maintaining the retaining wall & drainage system
Step 1: Preparing the area for drainage
Determine drainage placement
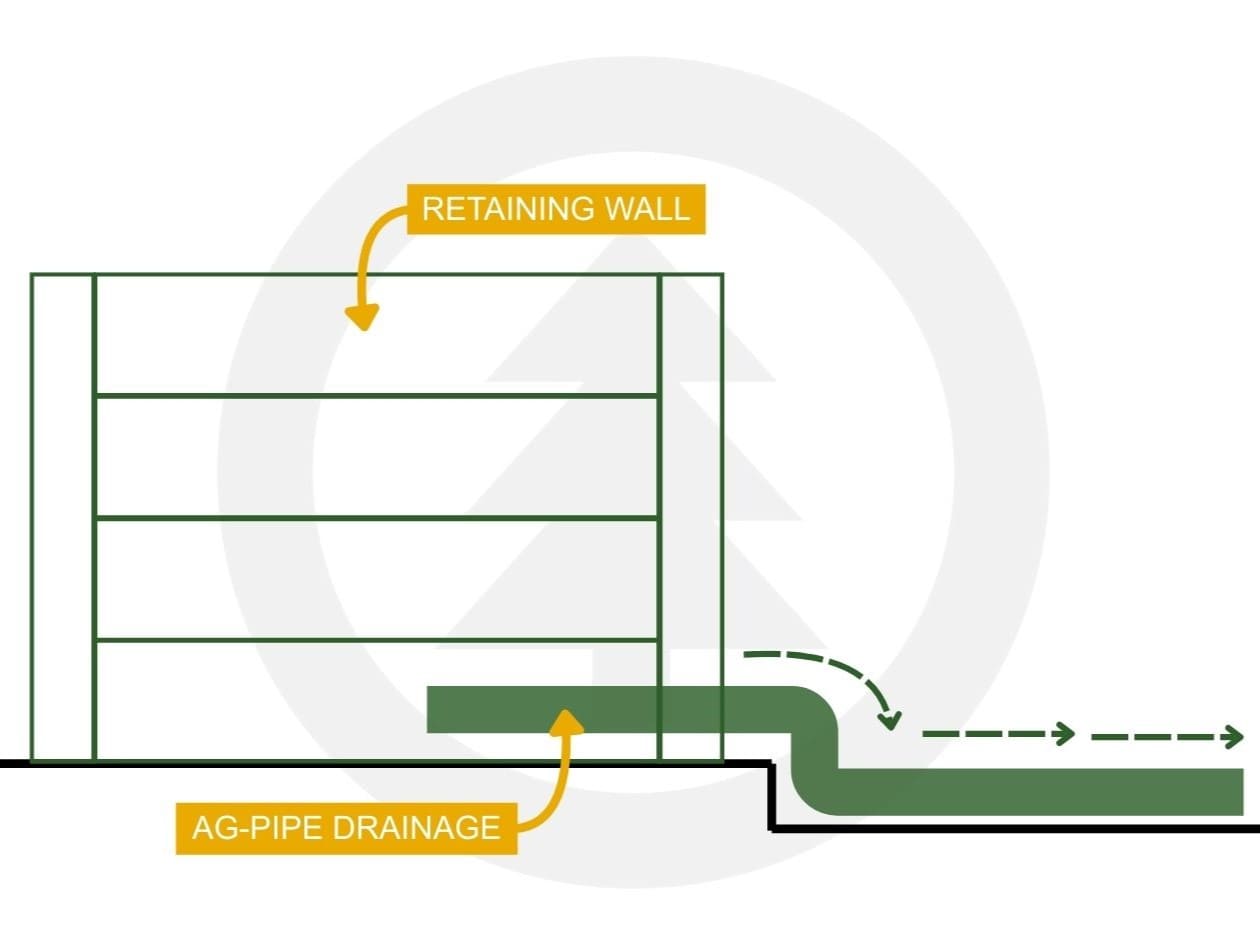
Using a brightly coloured spray paint, mark where the drainage pipe will start and exit the retaining wall. When choosing an exit point for the drainage system, we recommend placing it at the lowest part of a downward slope in the ground or near an external stormwater drain. This creates a natural direction for water to flow.
Dig trench
Dig a trench behind the retaining wall, following your marked path. Ensure the trench is deep and wide enough to accommodate your chosen drainage matting, pipe and gravel layer (50-100mm for SuperSleeper drainage mat and 30mm for geofabric drainage blanket).
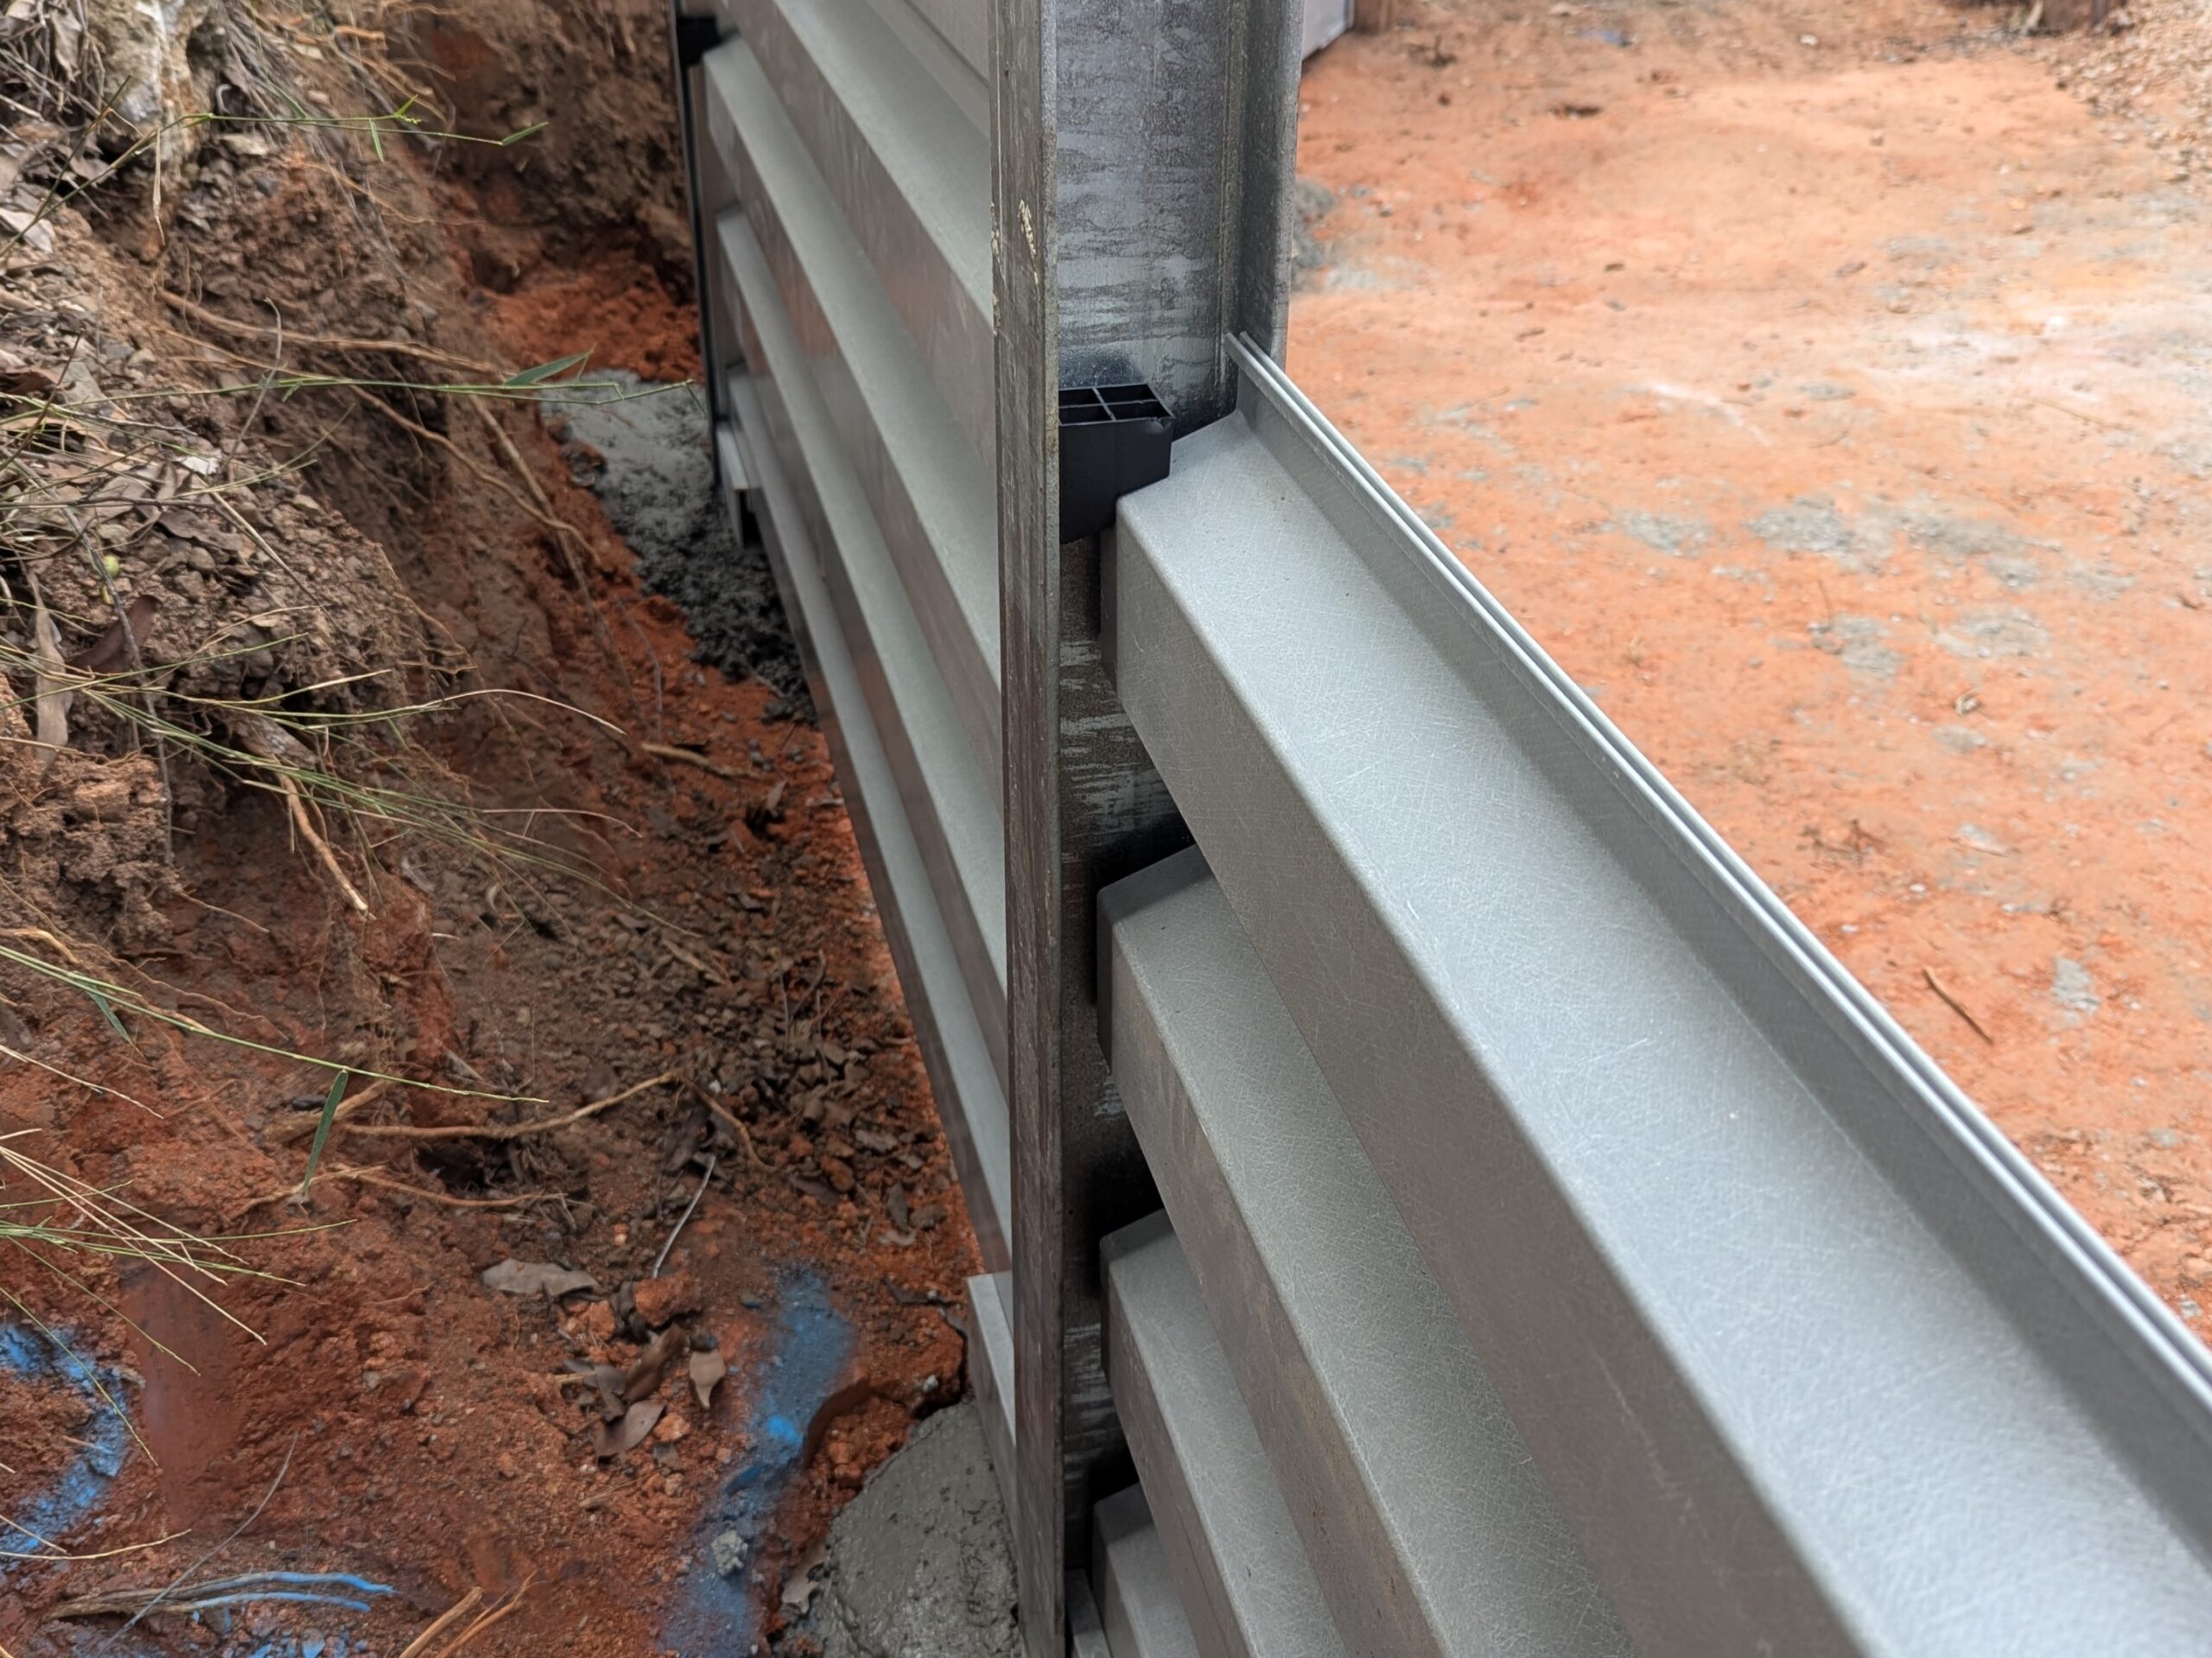
Step 2: How to install drainage blanket
A drainage blanket acts as a barrier between the retaining wall and earth. When choosing a drainage blanket – also known as retaining wall matting – for your composite sleeper retaining wall, you have two options;
- Geofabric drainage blanket (also known as bidum) – made from a non-decaying, continuous polymer geofabric
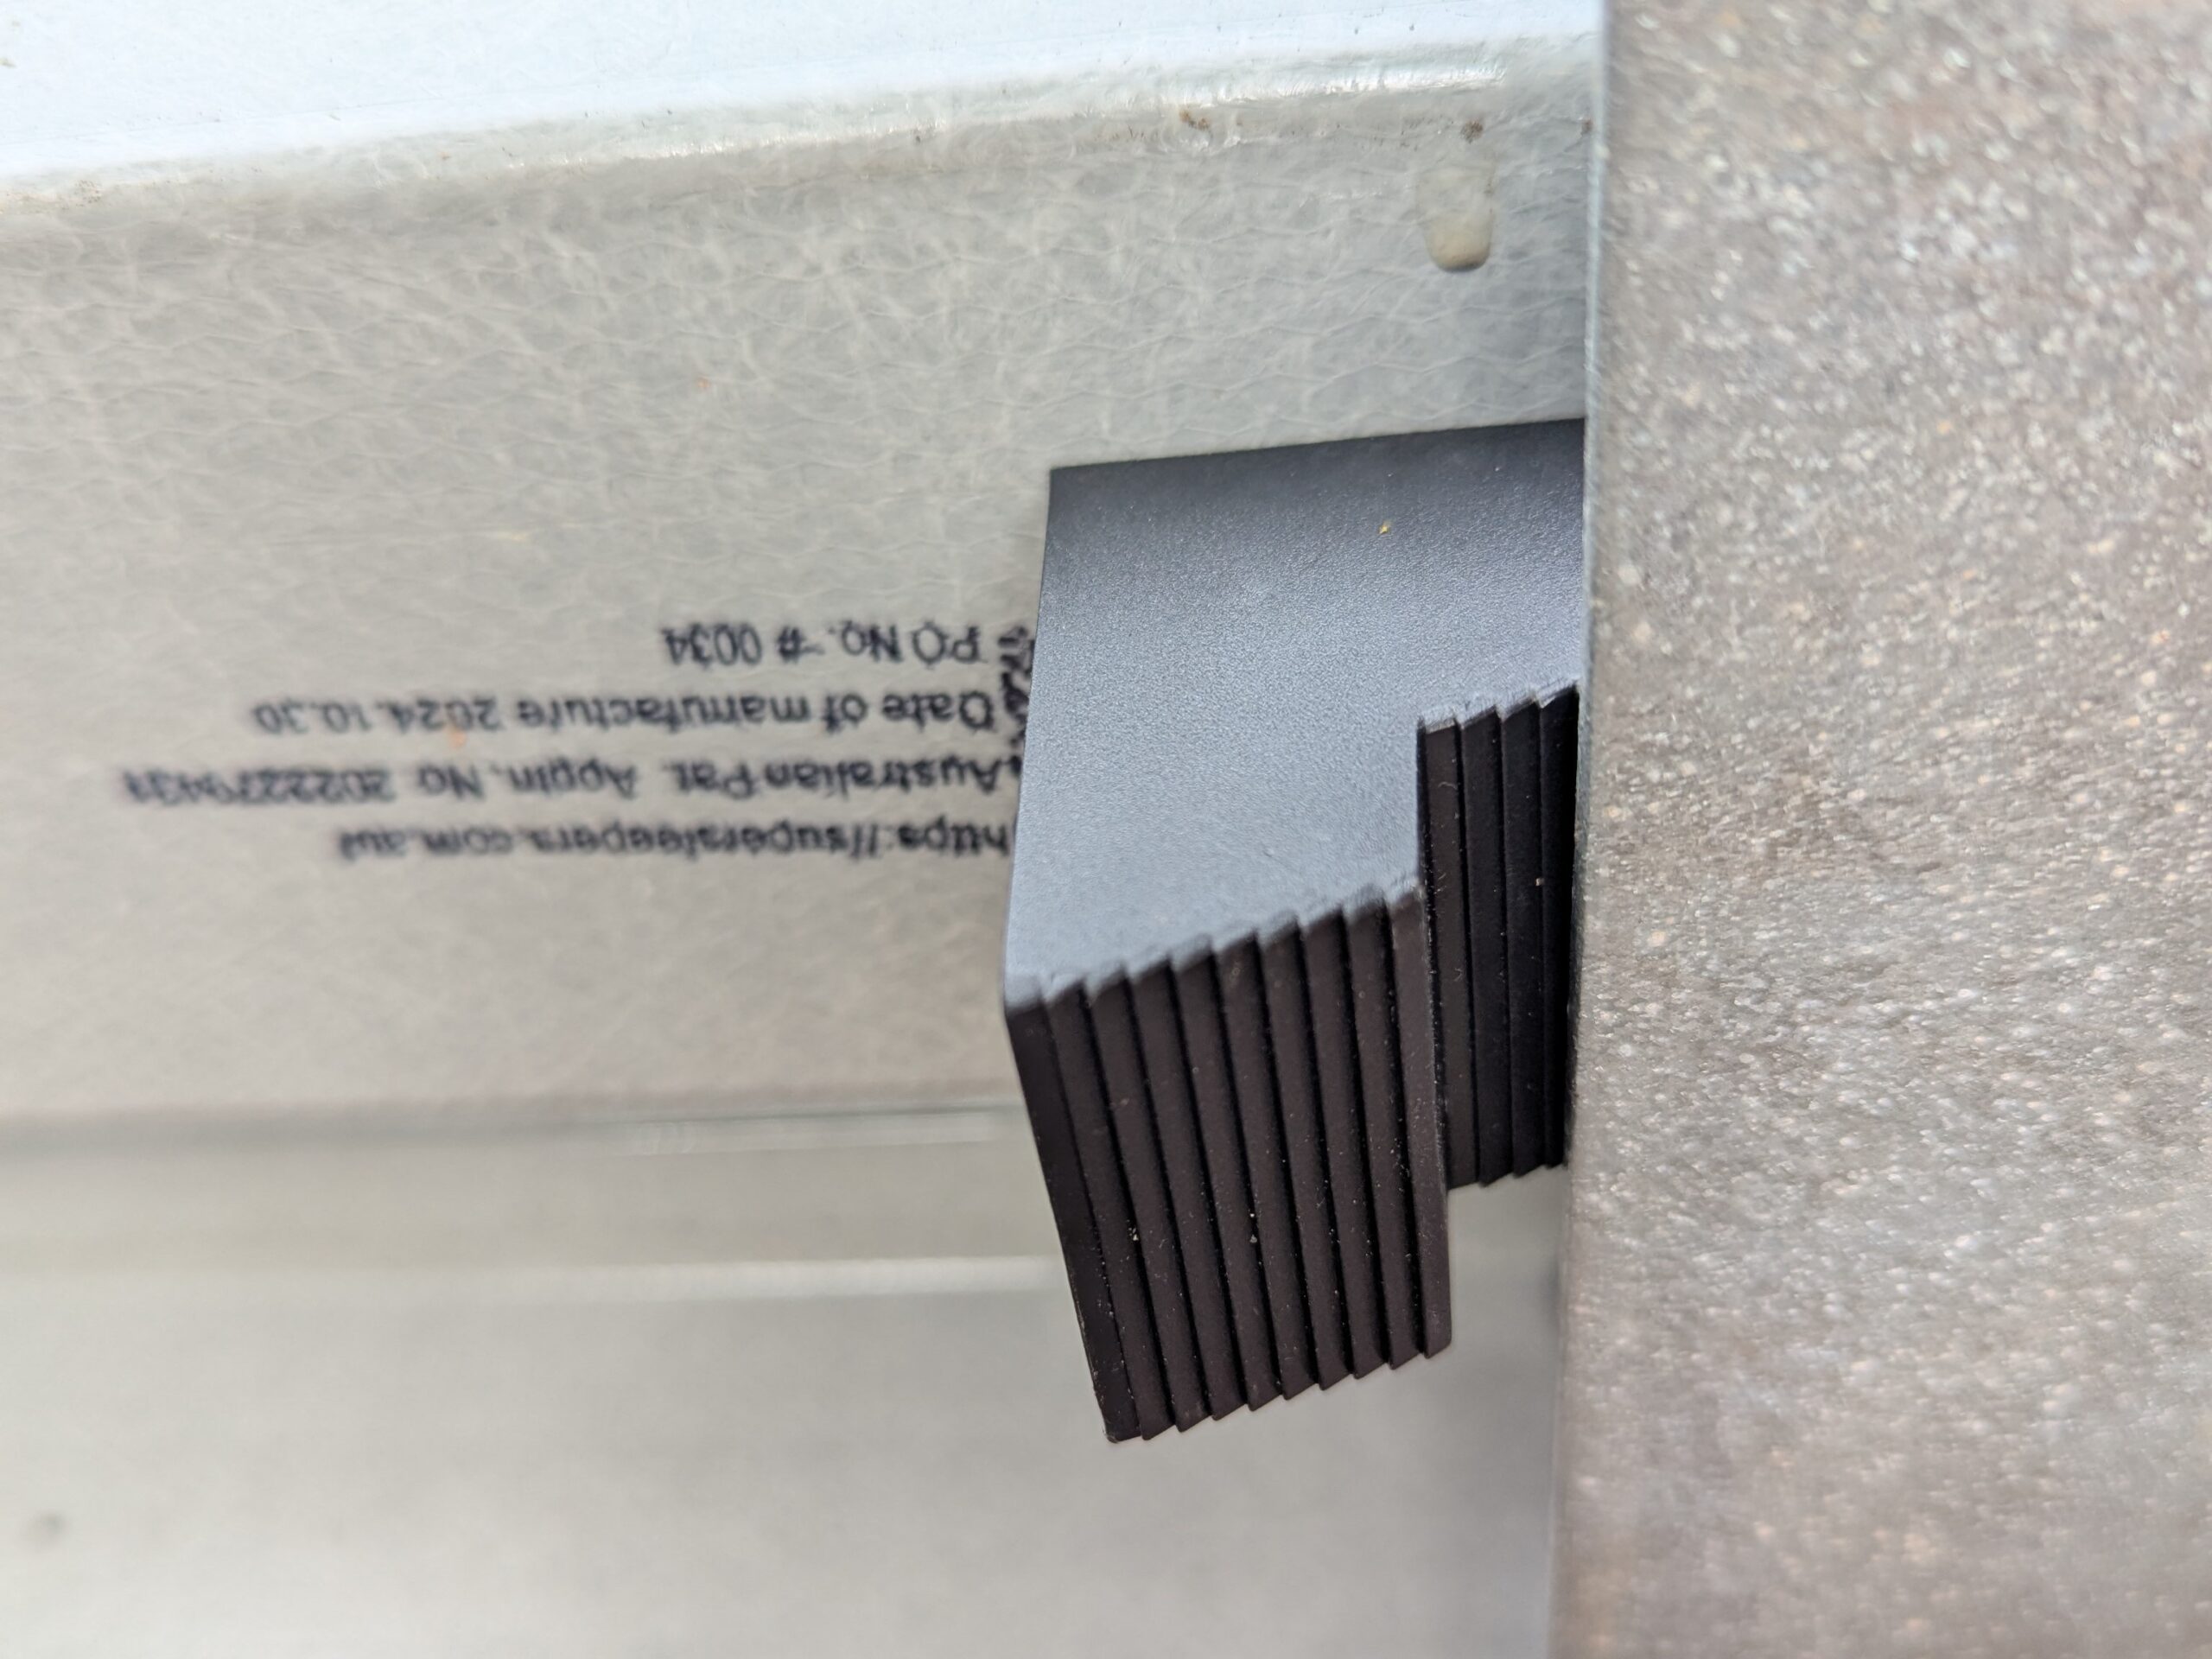
- SuperSleeper Drainage Blanket – consists of a series of interconnected dimples that create channels for water to flow through
The installation and effectiveness of both options are the same. Option 2 – SuperSleeper Drainage Blanket – works the best with composite SuperSleeper retaining walls as they’re designed to be used together.
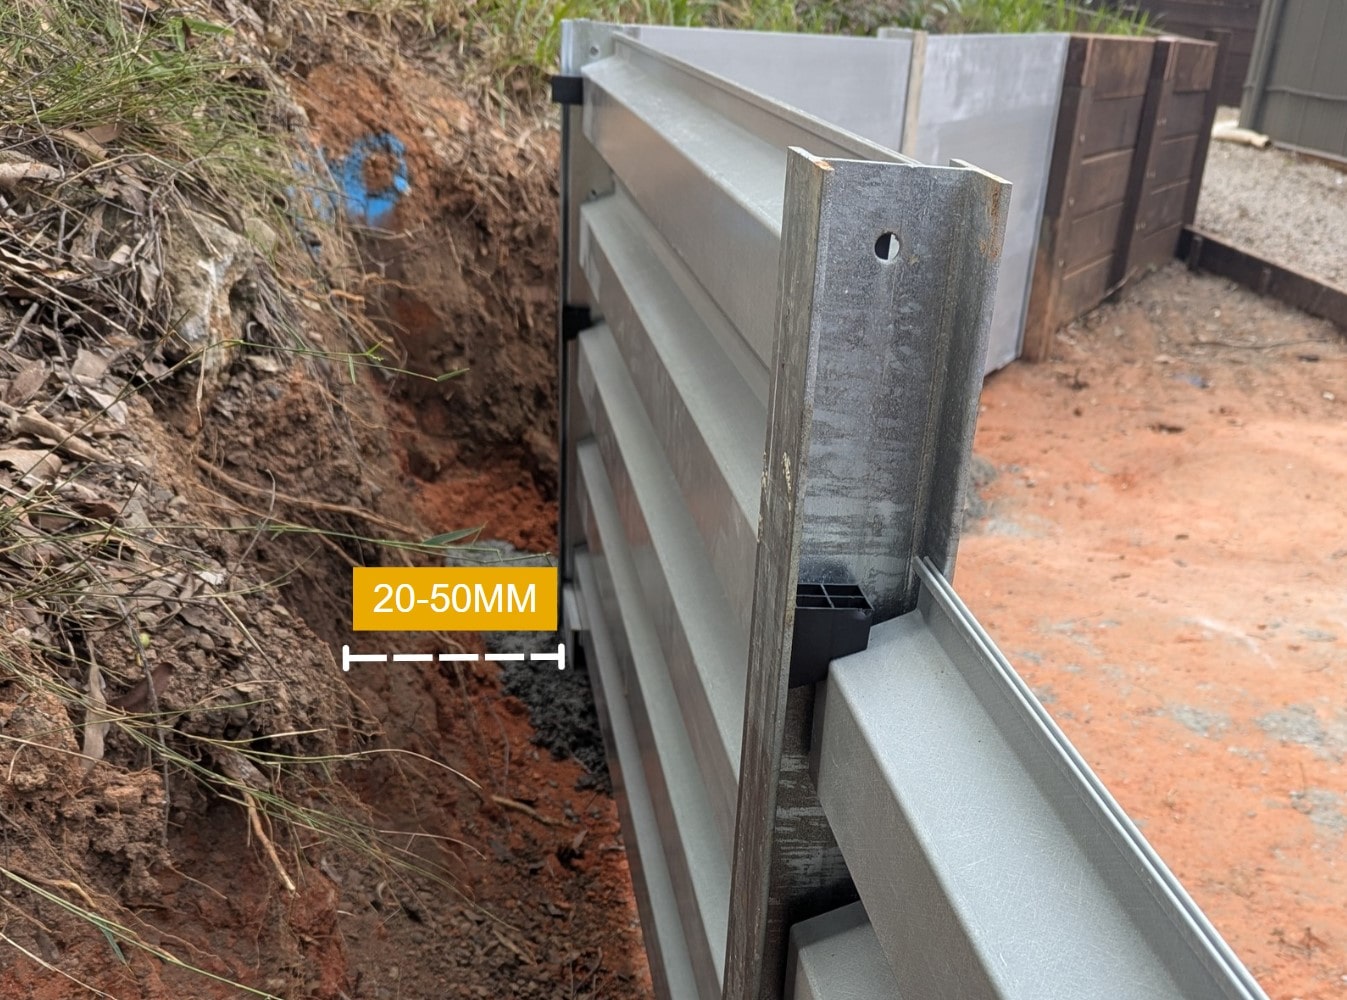
Placing the drainage blanket
The drainage blanket should line the back of the retaining wall and 20-30mm of the ground behind the wall. It should also line the backfill of soil behind the retaining wall. This is so that you can lay the ag-pipe over the blanket, and to stop debris from entering the drainage system after the soil behind the wall has been filled in.
To secure the drainage blanket in place, you can use small screws, nails or staples.
Step 3: Placing ag-pipe
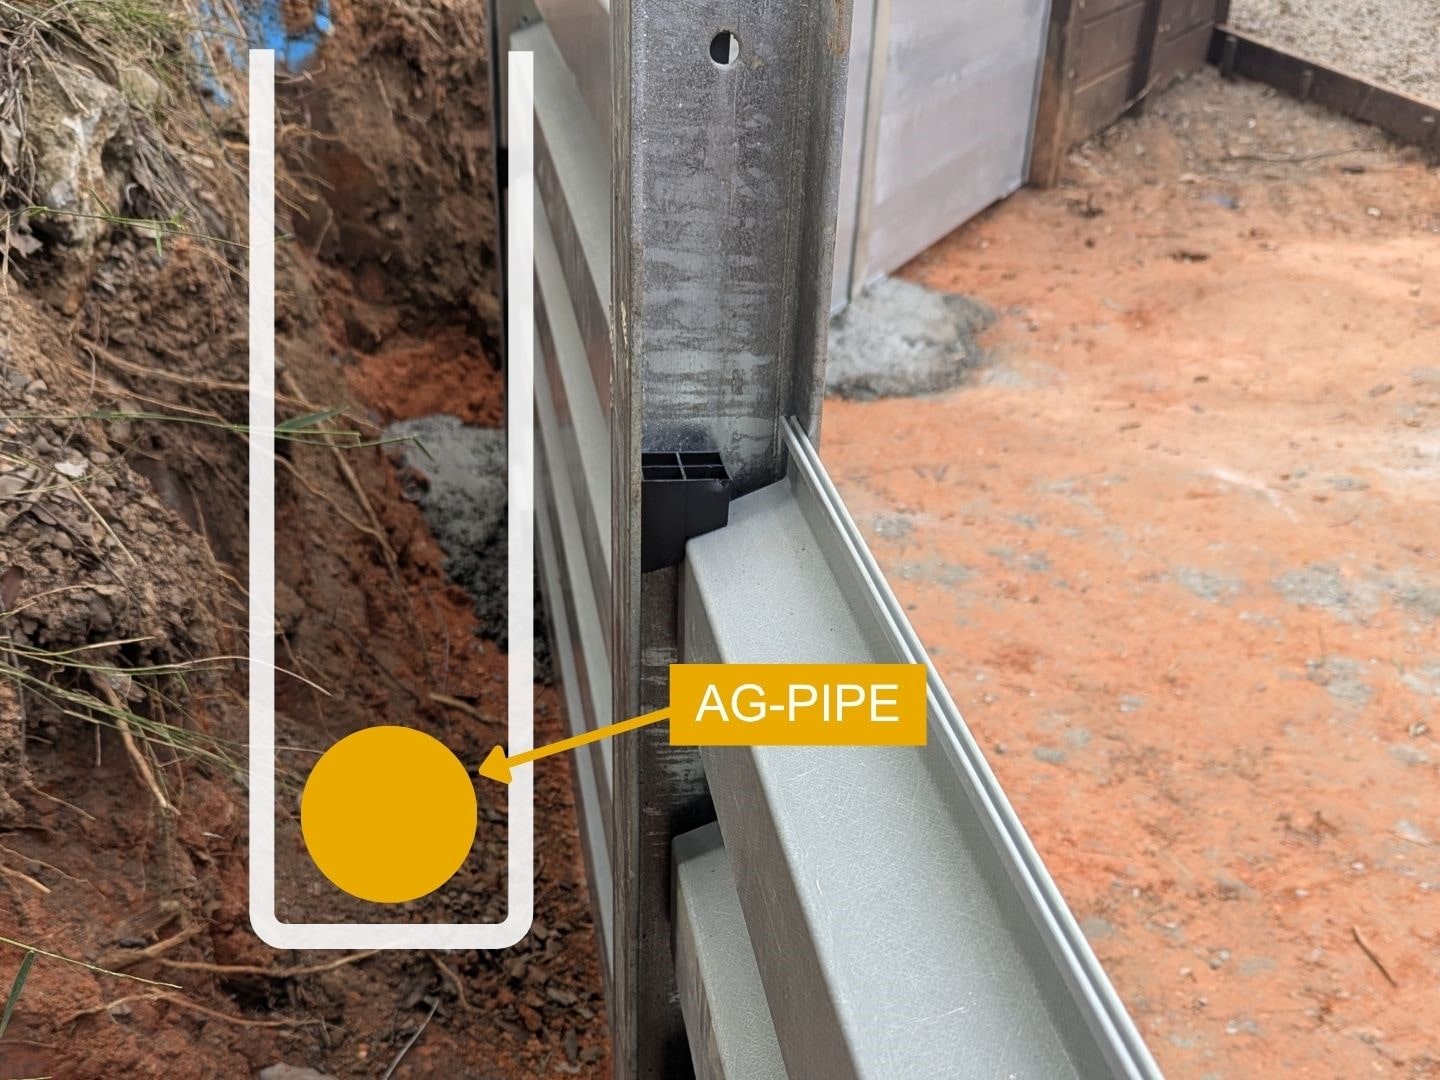
Ag-pipes sit at the base of the drainage system. It has small slits along its length to allow water to flow into it. The pipe helps move water away from the retaining wall to avoid hydrostatic pressure.
We recommend using a socked ag-pipe. These already have a ‘sock’ installed over the pipe which is a tight layer of netting fabric designed to deter debris from falling into the slots on the pipe and stopping water flowing through the pipe.
Position the ag-pipe at the base of the drainage blanket.
Tip: Run water through the drainage pipe to test its functionality. Ensure water flows freely through the pipe and exits the designated drainage point without pooling near the retaining wall.
Step 4: Adding drainage gravel & backfill
Proper backfilling is essential to the performance and lifespan of your retaining wall. It prevents water pressure from building up behind the wall, reduces the risk of movement or failure, and helps maintain good soil stability.
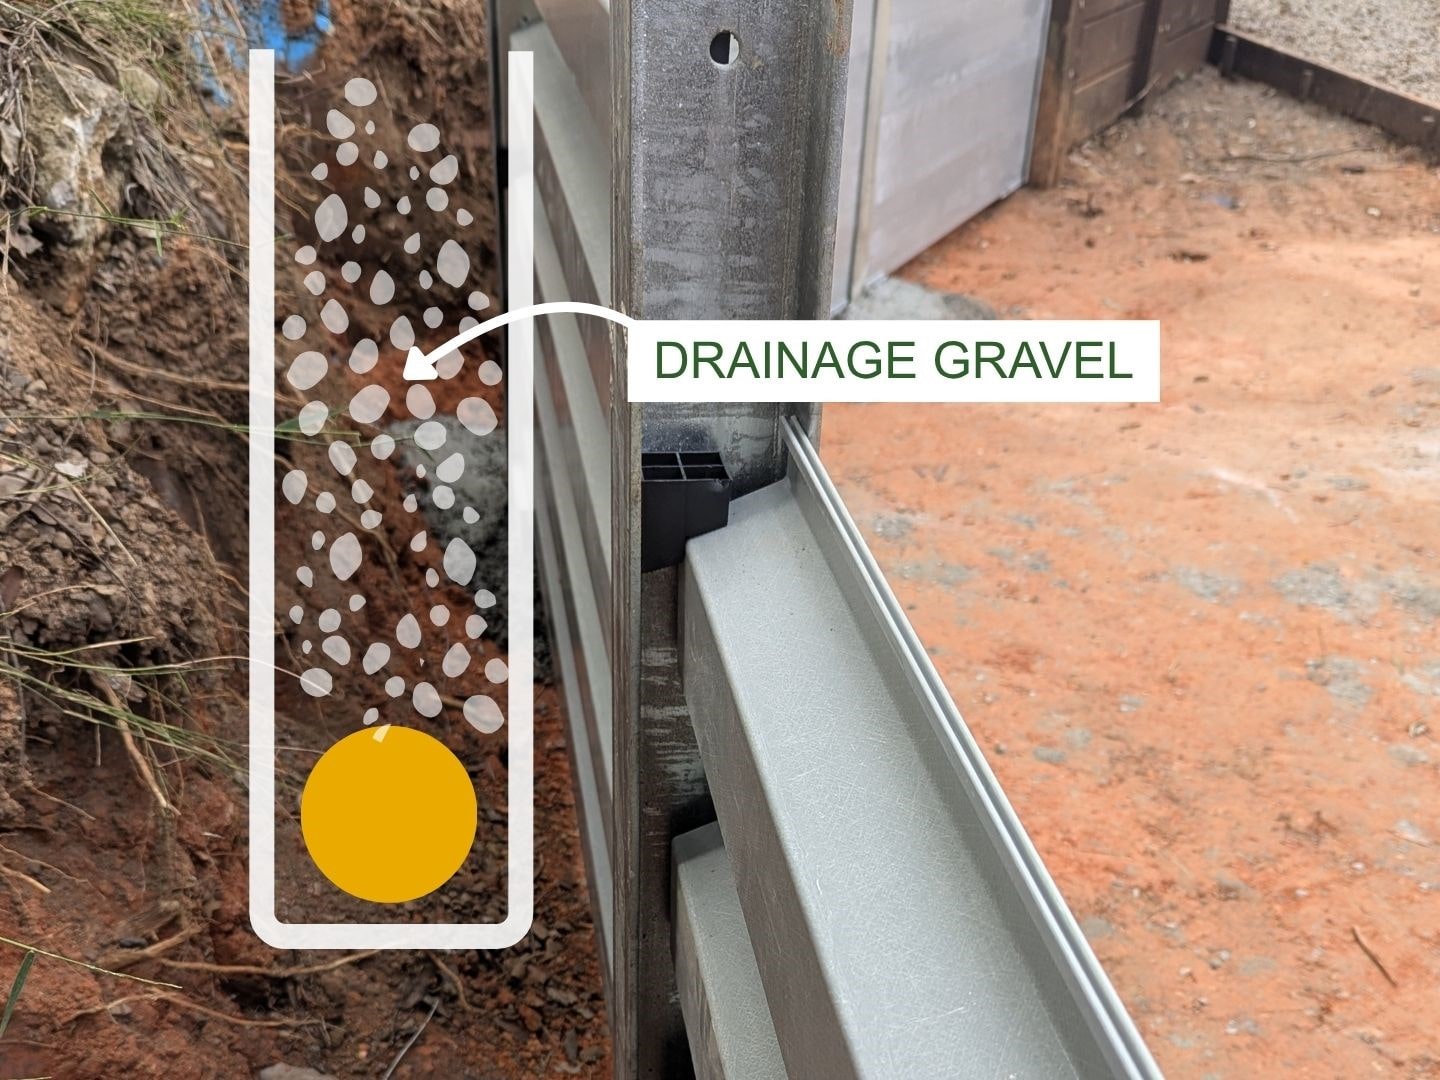
Add drainage gravel over the pipe
Once your drainage pipe is laid and in position, start filling the trench with drainage gravel. Fill the trench with as much drainage gravel as you prefer, leaving 100mm off the top to fill with clay. If you’ll be planting plants behind the wall you may want to leave more space for soil above the clay.
Note: drainage gravel is not needed when using SuperSleeper Drainage Mat.
Fill top with clay or dense soil
Once you’ve filled to your desired height with drainage gravel, even out the surface and add a layer of clay or dense soil directly on top of the gravel layer.
As you fill in the clay, maintain a gentle slope away from the wall to direct surface water runoff away from the structure. This will reduce how much water reaches your drainage system.
Finish with topsoil or mulch (if landscaping)
Once the backfill is complete, you can finish the top layer with soil for planting or mulch.
Placing the drainage blanket
The drainage blanket should line the back of the retaining wall and 20-30mm of the ground behind the wall. It should also line the backfill of soil behind the retaining wall. This is so that you can lay the ag-pipe over the blanket, and to stop debris from entering the drainage system after the soil behind the wall has been filled in.
To secure the drainage blanket in place, you can use small screws, nails or staples.
Step 5: Maintaining the retaining wall & drainage system
Even a well-built drainage system can wear down over time without regular maintenance. Routine checks and minor upkeep will protect your wall from hydrostatic pressure and structural wear – especially after heavy rain or seasonal changes.
Inspect for signs of drainage issues (every 3–6 months): Check the base of the wall for pooling water or boggy soil – signs that water isn’t draining properly. If you notice water bubbling up at the back or base of the wall, your drainage pipe could be clogged.
Clear ag-pipe of debris (every 3–6 months): If the end of your ag-pipe is exposed, check for a buildup of dirt, mulch or leaves and remove them.
Look for wall movement or warping (every 3–6 months): Walk along the length of your retaining wall and look for any leaning, bowing or cracking – especially at joins between sleepers.